
In this chapter we will create a simple KMDF driver
Install Visual Studio and WDK
1 Install Visual Studio
Install visual studio (latest)
Choose the following components:
- Desktop development with C++
- Windows Driver Development
2 Install Windows Driver Kit (WDK)
Get the latest WDK from the Mircrosoft official website, match it to your version of Visual Studio.
Once installed, you will get:
- Driver project templates
- Access to libraries
fwpkclnt.lib,fwpuclnt.lib, and header files
3 Setting Up a Testing Environment (VM)
Never test WFP drivers on your main OS. A bug in kernel code can BSOD your machine.
Create a dummy KMDF driver project
In Visual Studio → New Project → Kernel Mode Driver (KMDF)
Step 1: Kernel Driver (HelloDriver.c)
Driver Code:
// Include the basic NT Driver Development Kit header
// This provides core Windows kernel-mode definitions and functions
#include <ntddk.h>
// Include the Windows Driver Framework header (optional in this case, but required for KMDF drivers)
#include <wdf.h>
// ------------------------------------------------------
// DriverUnload: This function is called when the driver
// is being unloaded from the system.
// ------------------------------------------------------
VOID DriverUnload(PDRIVER_OBJECT DriverObject)
{
// This macro just tells the compiler we are not using this parameter
UNREFERENCED_PARAMETER(DriverObject);
// Print a debug message to the kernel debugger or DebugView
DbgPrint("WFP Driver: Unload called.\n");
}
// ------------------------------------------------------
// DriverEntry: This is the main entry point for the driver.
// It is called by the OS when the driver is loaded.
// ------------------------------------------------------
NTSTATUS DriverEntry(PDRIVER_OBJECT DriverObject, PUNICODE_STRING RegistryPath)
{
// We are not using the registry path in this driver, so we mark it as unreferenced
UNREFERENCED_PARAMETER(RegistryPath);
// Register the unload routine so Windows knows which function to call
// when the driver is being removed
DriverObject->DriverUnload = DriverUnload;
// Print a message to the debugger to show that the driver has loaded
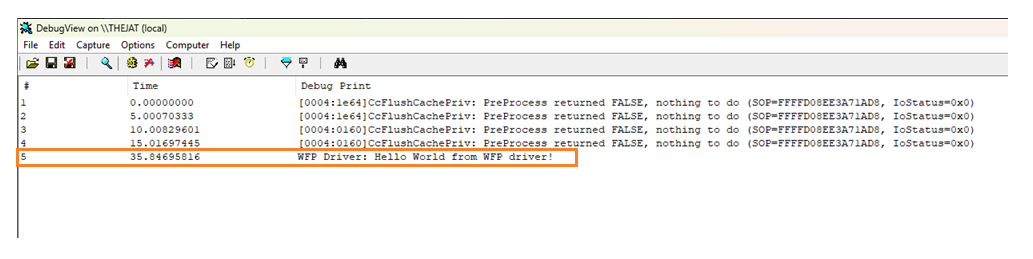
DbgPrint("WFP Driver: Hello World from WFP driver!\n");
// Return STATUS_SUCCESS to tell the OS the driver loaded successfully
return STATUS_SUCCESS;
}Step 2: Testing: Creating the service and starting it
Creation of the service:
sc create Hello-World type= kernel binPath= "C:\Windows-Driver-Development\1_Hello-World\1_Hello-World.sys"Start the service:
sc start Hello-World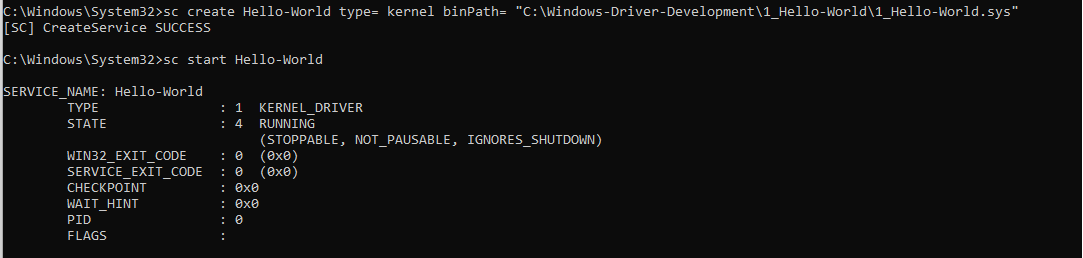
After starting the service we will see the debug message in the DbgView Debugger.
Step 4: Stopping and Unloading the driver
Run the following command to stop the driver:
sc stop Hello-World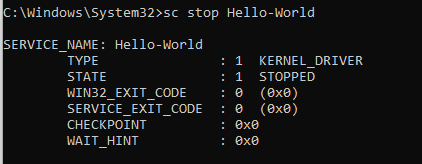

To delete the entry of the driver from the registry use the following command:
sc delete Hello-World
View DbgPrint Output
Download DebugView from this link, it will provide you a zip file, extract it.
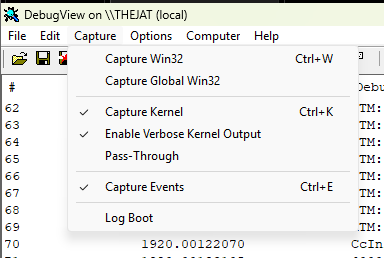
Run the Dbgview.exe from the extracted file as an Administrator.
Check the following options from the capture menu in top bar as shown in the below screenshot.

Leave a comment
Your email address will not be published. Required fields are marked *