Change Detection
Change detection is a fundamental concept in Angular that refers to the process of detecting changes in the application state and updating the user interface accordingly. Angular's change detection mechanism automatically tracks changes to the application's data and triggers the necessary updates to keep the UI in sync with the underlying data model.
How Change Detection Works:
- Initialization: When an Angular application is bootstrapped, Angular initializes the application's components and their associated views.
- Change Detection Cycle: After initialization, Angular enters a change detection cycle. During this cycle, Angular performs change detection for each component in the application.
- Data Binding: Angular's data binding features establish connections between the application's data model (component properties) and the user interface (template expressions). Any changes to the component's properties trigger change detection.
- Checking for Changes: During change detection, Angular compares the current state of the component's properties with their previous state to detect any changes. This process is known as dirty checking.
- Updating the UI: If Angular detects any changes in the component's properties, it updates the corresponding parts of the user interface to reflect the new state.
- Propagation: After updating the UI for a component, Angular propagates the change detection process to its child components, ensuring that changes are reflected throughout the component tree.
Example:
Consider a simple Angular component that displays a counter value and increments it every second using a timer.
import { Component, OnInit } from '@angular/core';

@Component({
  selector: 'app-counter',
  template: `
    <h1>Counter: {{ counter }}</h1>
  `
})
export class CounterComponent implements OnInit {
  counter: number = 0;

  ngOnInit(): void {
    setInterval(() => {
      this.counter++; // Increment counter every second
    }, 1000);
  }
}
In this example, the CounterComponent initializes a counter variable with a value of 0 and uses setInterval() to increment it by 1 every second. The counter value is displayed in the component's template using interpolation ({{ counter }}).
Understanding the Change Detection Process:
- Initialization: Angular initializes the
CounterComponentand renders its initial state, displaying the counter value as 0. - Change Detection Cycle: Angular enters the change detection cycle.
- Data Binding: The counter value is bound to the template expression {{ counter }}, establishing a connection between the component's property and the UI.
- Checking for Changes: During each change detection cycle, Angular compares the current value of the counter property with its previous value. Since the counter value is incremented every second, Angular detects a change in the counter property.
- Updating the UI: Upon detecting a change, Angular updates the corresponding part of the UI to reflect the new counter value.
- Propagation: Angular propagates the change detection process to any child components of
CounterComponent, ensuring that changes are reflected throughout the component tree.
As a result, the counter value displayed in the UI continuously increments every second, demonstrating Angular's automatic change detection mechanism in action.
Another Example:
// HTML code
<button (click)="Increment()">Increment</button>
<p>{{counter}}</p>
<button (click)="Decrement()">Decrement</button>

// TS code
import { Component, DoCheck, Input, OnChanges, OnInit, SimpleChanges } from '@angular/core';

@Component({
  selector: 'app-child-component',
  templateUrl: './child-component.component.html',
  styleUrls: ['./child-component.component.css']
})
export class ChildComponentComponent implements OnChanges, OnInit, DoCheck {
  counter = 0;

  constructor(private dataService: DataService) {
    console.log("Child Constructor called.");
  }


  Increment(){
    this.counter++;
  }
  Decrement(){
    this.counter--;
  }

  ngDoCheck(){
    console.log("Change Detection Called");
  }

}
Consider the example above, in this ngDoCheck() hook function called every-time change detection happens. Whenever we click on incrementdecrement button change detection occurs which updates the counter value in the template.
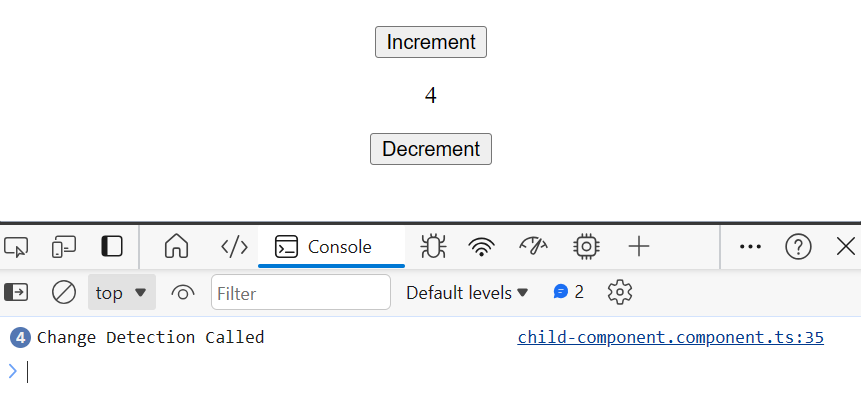
What happens if we don't do increment/decrement?
<button (click)="0">Increment</button>
<p>{{counter}}</p>
<button (click)="0">Decrement</button>
Here, we just broke the link of click event with the function that increments/decrements the counter and you will notice that the ngDoCheck hook function still get called while the counter remain the same.
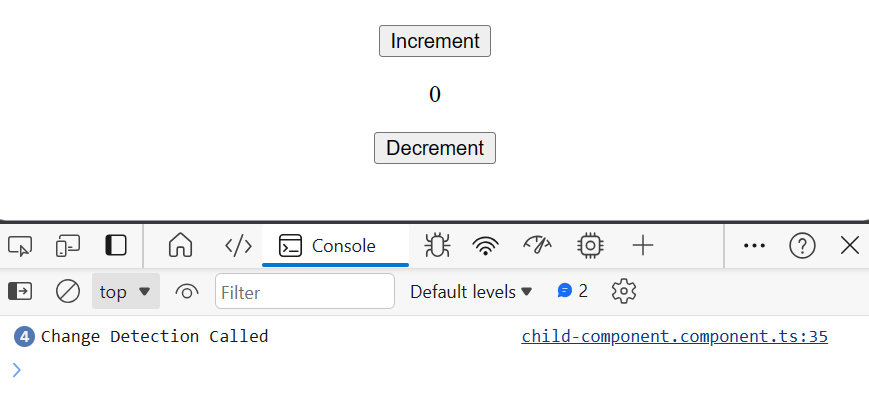
Thus it means if we don't change data/property then also change detection cycle runs. So whenever event change happens angular has to check if something has changed in angular app. Even though no property or data is changing angular has to run the change detection cycle.
Disadvantages of Change Detection
- A change detection cycle runs very frequently even when something has not changed in the Angular app. This can impact the performance of Angular application.
- Behind the scenes, the change detection cycle algorithm uses a library called as
zone.js. This overall increases the bundle size of Angular application. - The zone.js library also does not tell angular which component has changed and what part. Because of this, every time change detection cycle runs, whole application get's re-rendered.
To Overcome these disadvantages, angular has introduced signals.
Signals
- Signals gives us alternative way of managing and detecting changes in the data and update the UI. In this way, it allows Angular to get rid of that extra zone.js library.
- With signals, we do not have automatic change detection at all. Instead, we as a developer tell Angular when the data changes.
- In this way, signals lead to better performance and a smaller bundle.

Leave a comment
Your email address will not be published. Required fields are marked *